Once you have set the general path settings to your liking, it's time to start creating your steps.
Adding the First Step
Add Step
To add a step to the path in the experience, enter the title and click '+ Add Step'.

Path Label
Here you can give your path an internal name for your own reference.

Description
You can give your path a description, such as 'Welcome to the experience! Today you'll be shown around the winery.'

Movement Type
This decides the movement that the path will take as you move to the next step. You define this individually per step.
You can decide between an Instant, Fly, Fadeout, and Navigation movement type.

Moving To
For your first step in the path, you will not have a 'Starting Point'. However, you must define where you want the step to take the user.
You can decide on the location either by manually choosing the relevant sweep in the tour or by copying the tour link.
To copy the tour link, go into the public link of the tour and click 'Ctrl + Y' on a Windows device or 'Command + Y' on an IOS Device.

Next Step Trigger
The element that triggers the next step in the path needs to be defined in two ways.

The first way is by the Type. This refers to the type of element, whether that be a tag, polygon, VS image etc.
If you would like the next step to appear after the user clicks on an image, for example, then you would choose VS image as the next step trigger.
The second way is by Location. This assigns the next step trigger to a specific spot in the tour where the chosen element has been placed. For example, the specific image can be one of a checkmark.

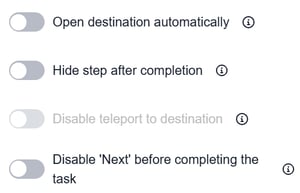
Open destination automatically
This will automatically open the content placed at the destination where the step is taking the user.
Hide Step After Completion
This will hide any elements in the path after they have been clicked.
Disable teleport to destination
Disable 'Next' before completing the task
If checked, 'Next' button will be not active until user does not complete current task.
Delay Path Appearance

This will allow you to delay the appearance of the path. You can define the delay according to minutes and seconds.
Once you add the step it should save and appear at the bottom of the page.
Adding the Second Step
Add Step
To add the second step to the path in the experience, click '+ Add Step'. You will define the Path Label, Description, and Movement Type according to the same functionality as you did the first path.
Starting Point
You'll notice that you now have a Starting Point, which you didn't have for your first step.
The Starting Point should automatically be set to the previous step's 'Next Step Trigger'. Be sure to double check this and correct it if needed.
If the starting point of your second step is not aligned to the previous steps's next step trigger, then the path will not work.

Moving To
Decide either via sweep or tour link where you would like your second step to take the user.
Next Step Trigger
Define the next step that the path should take according to Type and Location, like you did with the first step.
Open destination automatically
This will automatically open the content placed at the destination where the step is taking the user.
Hide Step After Completion
This will hide any elements in the path after they have been clicked.
Delay Path Appearance
This will allow you to delay the appearance of the path. You can define the delay according to minutes and seconds.

Once you add the step, it should save and appear at the bottom of the page.

Follow the same formula for ALL STEPS in the experience.