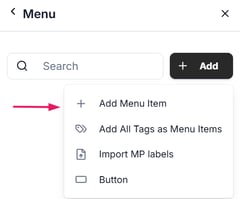
The Gallery action type allows you to visually enrich your Burger Menu by displaying a collection of images in a gallery layout. To get started, click +Add → add new item:
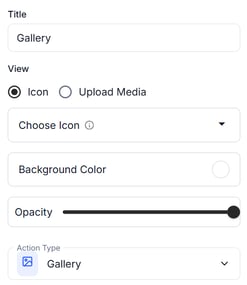
Enter a title, choose the icon, background colour and opacity if needed and select the Gallery action type:
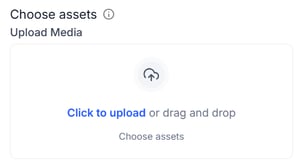
Proceed to Click to upload if you wish to add pictures from your tour library or drag and drop the files from your computer to this box:
If you choose to upload from the library, you can select images that were previously manually uploaded to the library (1), as well as tour images, automatically pulled from your Matterport photos - by checking the box next to each image (2).
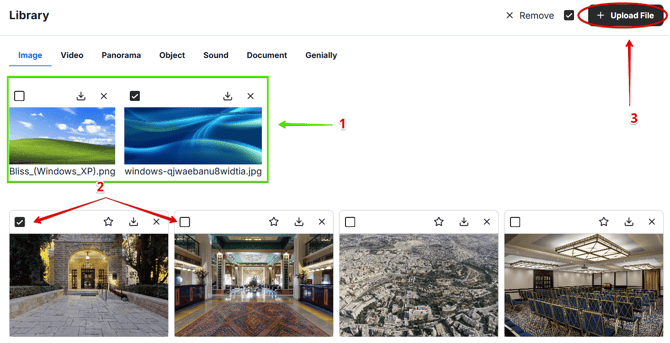
If you wish to upload new images from your computer, click Upload File (3), add choose the files from your device. You can upload up to 10 images at a time, with a size limit of 10 MB per image (20 MB for Business and Enterprise users). The maximum resolution is 2048 pixels for width and height.
Once you select the images from your device, they will appear next to the previously uploaded images:

Now, select the images you need by clicking the checkbox next to each one. Once you have chosen all the required images, scroll to the bottom of the media popup and click Import.

Once your images are imported, you will see a list of the selected items. If needed, you can rearrange their order by dragging and dropping them using the icon with three lines, as shown above. When everything is set, click Save.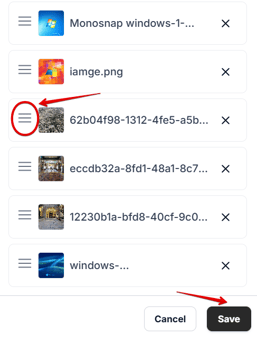
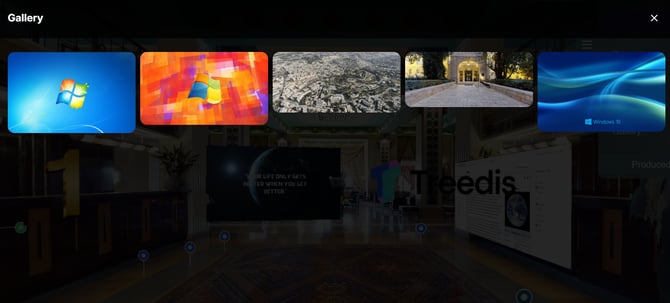
This is how the Gallery feature will appear within the tour:
If you have further questions or need assistance with the settings, please contact us at support@treedis.com