Green screen videos allow you to seamlessly place a filmed object or speaker into a 3D space, removing any background for a immersive effect. This can be achieved using our Media tools. Simply upload an MP4 video with a green background, and our system will integrate it into your 3D environment.
How to Add the Green Screen Video via Media?
To use the Green Screen feature for videos, open the Media feature, click + Add and select the Video action type.


Upload your MP4 file (1), ensuring it meets the video limits specified by your plan. Once the video is uploaded, enable the Use Green Screen (2) toggle.

Our Three.js application will automatically remove the background. While green is a popular choice, any color background can work. For optimal results, consider consulting professional video editors to create a high-quality green screen video.
You can also adjust the video’s position in the space by modifying the X, Y, and Z rotation parameters (1).
Additionally, you can use the Lock Scale toggle (2) to adjust the video size while maintaining its fixed aspect ratio. Disable this toggle, if you want to manually set the video’s X and Y Scale parameters (3).
Once you have made all the necessary adjustments, be sure to click on Add (4) to save the video to your media files list and continue with placing it in your space.

Place the video in the tour and adjust its parameters to fit your needs. You can modify the video’s size and position using the Move, Rotate, and Scale buttons:

Explore additional toggles for more control:
- Active: Makes the video visible in the tour with "play" and "mute" buttons. Disable this toggle to hide the video in the tour.
- Autoplay: Starts the video automatically with the sound muted.
- Hide Mute Button: Plays the video automatically with sound enabled.
- Mute Sound: Plays the video muted without the option to turn the sound on.
- Hide When Animation is Complete: Removes the video from the tour after its animation ends.
- Loop: Repeats the video continuously.
- Show Pre-Loader Animation: Displays a loader animation while the video is loading.
- Auto Rotate: Rotates the video automatically to face the user's position.
Green Screen Configuration Settings
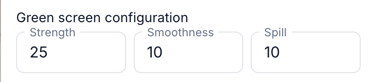
The Green screen configuration allows you to fine-tune how your green screen background is removed and blended into the tour. There are three key settings:
-
Strength - controls how strongly the green colour is removed from the video. Higher values remove more of the green, but may also affect other nearby colours.
-
Smoothness - adjusts the softness of the edges around the subject. Increasing smoothness helps reduce harsh outlines and makes the subject blend more naturally.
-
Spill - reduces the green “spill” or glow that can sometimes appear around the subject. Higher values remove more green tint from edges like hair or clothing.
By balancing these three values, you can achieve a clean and natural look for your green screen videos inside the tour.
To make your video more interactive, you can also configure the After Click Effect and Animation settings for your video.
| After Click Effect |
Animation |
|
|
High-quality videos will generally work seamlessly with the default settings. However, you can adjust the following parameters as needed to better integrate the video into your 3D space.

- Enable Hover Animation activates the object's animation only while the cursor hovers over it.
- Render Range defines the distance from which the video becomes visible in the tour.
- Start Animation Distance specifies the range within which users will see the animation assigned to the video as they approach it.
- Delay Appearance After Trigger is used in Experience tours with locked conditions, ensuring the media object is revealed after a specific trigger.

You can also adjust the video’s position and rotate it in the space by modifying the X, Y, and Z parameters.
Use the Lock Scale toggle to adjust the video size while maintaining its fixed aspect ratio. Alternatively, turn off this toggle if you want to manually set the video’s X and Y dimensions.
If you have any questions or need further assistance, please contact us at
support@treedis.com