Virtual Staging is a feature that allows you to implement 3D objects into your virtual tours, enhancing their visual appeal and interactivity. These objects can range from furniture to any item that suits your creative vision.
Functionality
3D object can be added to the tour in 3 ways:
-
By using a GLB format, compressed into a ZIP file.
-
Through Sketchfab integration.
-
By selecting available objects from the tour's Furniture library.
Adding 3D Objects to the Tour
If you want to add your own object, choose My Objects and click + Add.
1. Upload your object in GLB format, compressed as a ZIP file (mind the specified size limits).
2. Add an Asset Icon (optional) for a preview image to distinguish your object in the library.
3. Add Asset Audio, if you want your object to have the voiceover.


Once uploaded, the object will appear in the tour library. Click on it and place an object on your space:


When you place an object on the space, you can adjust its parameters to fit your needs. You can modify the size and position using Move, Rotate, and Scale buttons (1) or by modifying the X-Y-Z Position and Rotation parameters manually (2) .


Additionally, you can use the Lock Scale toggle (3) to adjust the object's size while maintaining its fixed aspect ratio. Alternatively, turn off this toggle if you want to set the scale manually (4):
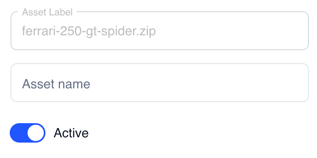
- Asset name - to label the object within the tour workspace.
- Active - to make the object visible in the tour. Disable this toggle if you want to hide the object without deleting it.

- Enable hover animation - activates the object's animation only while the cursor hovers over it.
- Enable animation - to play animation of the 3D object.
- Hide when animation is complete - hides the object within the tour after its animation ends.
- Add loader animation - displays a loader animation while the video is loading.
- Enable idle animation - toggle on to play an idle animation when the 3D object is not performing any other actions (this feature works only with models compatible with Mixamo animations).
- Loop - repeats the object's animation continuously.
- Audio - the uploaded asset audio will be played once the object starts its animation.

- Render Range - defines the distance from which the object becomes visible in the tour.
- Start Animation Distance - specifies the range within which users will see the animation assigned to the object as they approach it.
Note: Default render distance is set at 25 m and 5 m for animation, however, you are free to set the distance per your needs. If you don't set up this distance, it makes all items load together on the tour at the same time.
Important: The render distance can't be bigger/longer than the tour scale itself. For example, if your room is only 10 meters long, then the render range should be within the same range.
Additionally, an object inside your tour can be assigned specific actions to enhance interactivity and guide visitors through the space.
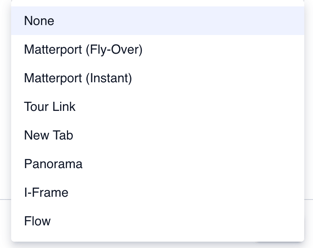
- Matterport (Fly-Over) – redirects visitors to a Matterport tour with a fly-over transition effect. The deep link for location can be retrieved by pressing U inside the Matterport tour.
-
- Matterport (Instant) – redirects visitors to a Matterport tour with a direct-entry effect. The deep link for location can be retrieved by pressing U inside the Matterport tour.
- Matterport (Instant) – redirects visitors to a Matterport tour with a direct-entry effect. The deep link for location can be retrieved by pressing U inside the Matterport tour.
- Tour Link – redirects visitors a specific location within the Treedis tour. The deep link for the location can be retrieved by pressing CTRL+Y inside the Treedis tour.
- New Tab – opens the specified content in a new browser tab.
- Panorama – opens a panorama view (ensure the panorama is added and enabled for the tour beforehand).
- iFrame – embeds and displays external website content directly within the tour. Use an iFrame tester to verify if the link is compatible.
Sketchfab
To add a 3D object using a Sketchfab, you need to integrate your Sketchfab account with the Treedis platform. Follow this link for a video guide on how to synch Sketchfab with Treedis.

After synchronizing your Sketchfab account, enter the desired object's name into the search bar. If you want the object to be animated (moving), turn the Animation toggle on, otherwise, object will remain static.

Once you have selected your preferred object, place it within your space:

All objects added to the tour are automatically organized under the Scene section. This section allows you to navigate through all 3D objects added to the tour, adjust the render range and animation distance, and fine-tune color settings to control lighting and shadows.


Furniture Library
Another convenient method for adding 3D objects is through the furniture library integrated into the Treedis platform. Simply select the "Furniture" group, enter the desired item in the search bar, choose the 3D object, and place it within your space.
You can adjust the object's size and location immediately or modify these settings later in the Scene section:


If you have further questions or need assistance with the settings, please contact us at support@treedis.com