The Users tab in the tour’s Manage section displays the tour owner’s information and the email addresses of users who have access to the tour. Use it to invite people to collaborate on a tour and manage their access to the project.
Users can be invited directly from your workspace (via the Users tab) or from the tour’s Manage section, as described below.
How to Invite Users to a Tour
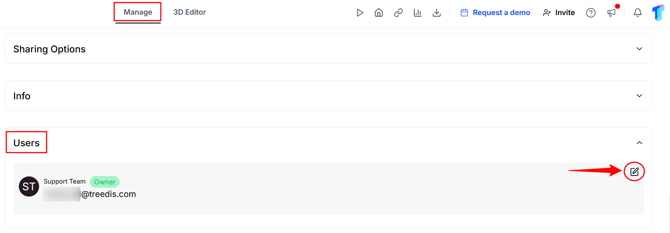
Open the tour's Manage section → scroll down to Users → click the Edit button on the right:
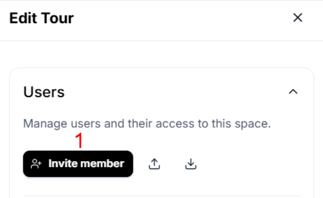
1. In the Edit Tour panel, click the Invite member button.
2. Enter the email address of the person you want to invite. To invite several people at once, separate the emails with commas. Then click Add.
3. Choose a role for the invited person from the dropdown next to their email: Editor, Admin, Viewer, or a custom role.
4. Click Send invites.
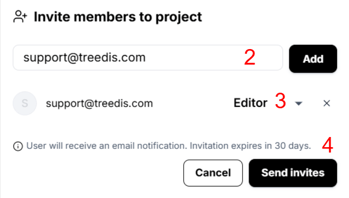
Note: Once you click Send invites, the recipient receives an email invitation. For security reasons, invitations expire automatically after 30 days if not accepted.
Importing and Exporting Users
The two icons next to Invite member allow you to import and export users in bulk.
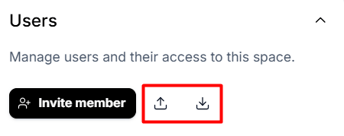
- Import: Upload a file to add multiple users at once instead of inviting them individually.
- Export: Download the current user list to review invited members or import the list into another tour.
Editing or Removing a User
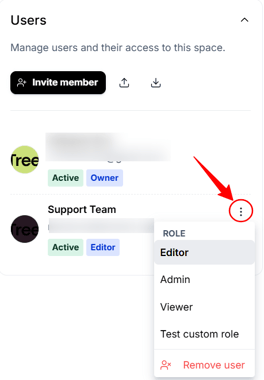
- Find the User in the list.
- Click the three-dot menu on the right side of their row.
- Select an action, such as changing the User's role or removing them from the tour.
If you have any questions or need assistance with the settings, please contact us at support@treedis.com