Collaboration is essential to any successful project, and Treedis makes it simple to monitor who has access to your workspace and what actions they can perform.
A member of a workspace is called User. A user is a real person with their own profile who signs in using their credentials. You can grant users permission to see specific tours, view all tours, or manage your workspace. These permission levels are known as Roles in the Treedis platform.
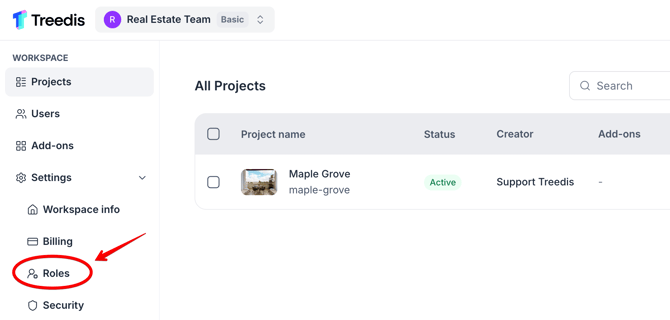
To view or manage roles, navigate to Settings > select Roles in the left sidebar.
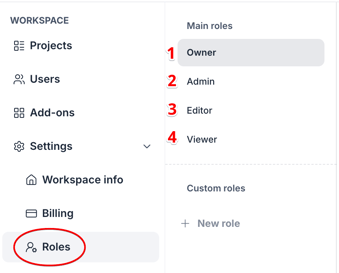
Access Types: Default Roles
Treedis includes four default user access types: Owner, Admin, Editor, and Viewer.
These roles are designed to match different business needs, whether you are collaborating with marketing, finance, or external contractors. Roles allow you to grant users only the permissions they require.
-
The Owner is the workspace holder. Every workspace has exactly one Owner who maintains full control over workspace settings, billing, security, integrations, and user management. Only the Owner can delete the workspace.
- Everyone else invited to the workspace becomes a User with an assigned role that determines what actions they can perform on the platform.The three assignable roles are Admin, Editor, and Viewer. These default roles come with predefined permissions and cannot be modified, ensuring consistent behavior across all workspaces.
| Role | Access Level |
| Admin | Can manage the workspace, content, and its members. Admins can invite users and assign roles but do not have billing or ownership privileges. |
| Editor | Designed for content creators. Editors can manage assigned tours and content but do not access billing settings or core workspace configurations. |
| Viewer | Can view assigned tours without editing permissions. Ideal for stakeholders who need visibility into projects without making changes. |
Access Types: Custom Roles
If the default Admin, Editor, and Viewer roles do not fit your workflow, you can create your own roles with custom permissions.
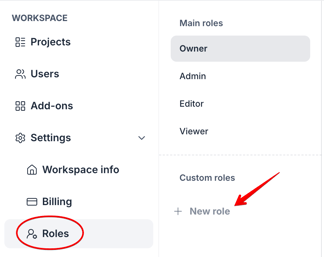
To create a custom role: go to Settings > Roles in the left sidebar. Click + New role under the Custom roles section.
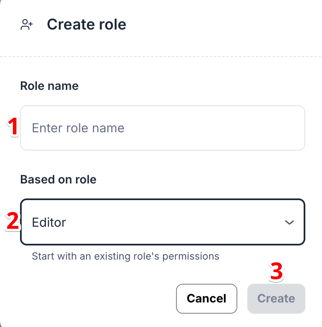
1. Enter a unique Role name (e.g., "External Contractor"). Note: The system will display a warning if you attempt to use a name that already exists.
2. Use the Based on role dropdown menu to select an existing role template (like Editor). The new role will inherit its starting permissions, and reduce the need for manual checkbox configuration.
3. Click Create.
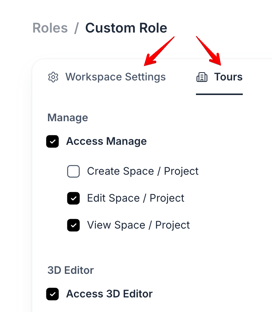
Customizing Permissions
Once your custom role is created, you can fine-tune it by checking or unchecking individual permission boxes across categories like Workspace Settings and Tours.
This allows you to create highly specific permission sets tailored to your team's needs.
Important: After making edits, always click Save Changes in the top-right corner. A confirmation message ("Permissions saved") will appear to verify that the changes have been successfully applied.
If you have further questions or need assistance with the settings, please contact us at support@treedis.com